No edit summary |
No edit summary Tag: Visual edit |
||
| (10 intermediate revisions by the same user not shown) | |||
| Line 1: | Line 1: | ||
= Introduction = |
= Introduction = |
||
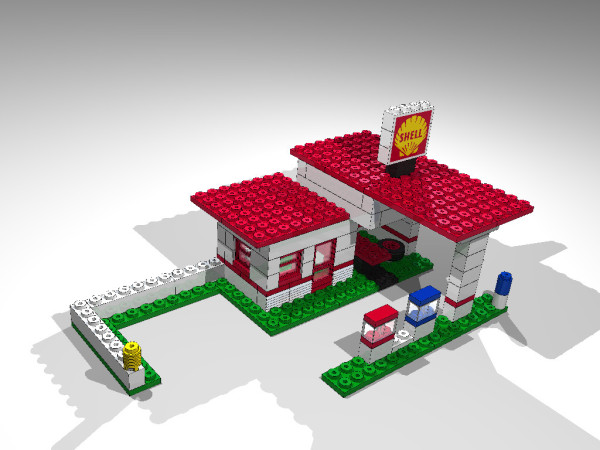
LDraw™ is an open standard for LEGO CAD programs that allow the user to create virtual LEGO models and scenes, but we can also make TENTE ones. |
LDraw™ is an open standard for LEGO CAD programs that allow the user to create virtual LEGO models and scenes, but we can also make TENTE ones. |
||
| + | [[File:Estaciondeserviciojaponesa2 600x450.jpg|thumb|220x220px]] |
||
| − | |||
You need a set of virtual pieces, an editor to make the models and a viewer to render and see like real ones. |
You need a set of virtual pieces, an editor to make the models and a viewer to render and see like real ones. |
||
We are going to use MLCad as editor and LDView as 3D viewer. Both programs are free and lego users use them for years. |
We are going to use MLCad as editor and LDView as 3D viewer. Both programs are free and lego users use them for years. |
||
| Line 8: | Line 8: | ||
= The files you need = |
= The files you need = |
||
| + | * [https://www.dropbox.com/s/irba95qphdxtiq7/LDrawTente_Ultima.zip?dl=0 Tente set of pieces in LDraw format]. |
||
| + | *[http://ldview.sourceforge.net/Downloads.html LDView], the GNU 3D viewer. |
||
| − | - Tente set of pieces in LDraw format, some example models and some configuration files (update): |
||
| − | http://dl.getdropbox.com/u/1076721/LDraw/LDrawTente_Ultima.zip |
||
| − | |||
| − | - LDView, the free 3D viewer (If you have problems, press “Direct link”, or “mirror” and seleccionar another server): |
||
| − | |||
| − | -- For Windows: http://downloads.sourceforge.net/ldview/LDView-4100.exe?download |
||
| − | |||
| − | -- For GNU/Linux: http://downloads.sourceforge.net/ldview/ldview-4.0.i386.deb?download |
||
| − | |||
| − | - MLCad, the free editor: |
||
| − | http://www.lm-software.com/mlcad/mlcad320.zip |
||
| − | |||
| − | (version with more languages, for more recent versions read more down)<br /> |
||
| − | |||
| − | |||
| + | *[https://www.lm-software.com/mlcad/MLCad_V3.40.zip MLCad], the free editor for Windows (GNU/Linux compatible with wine).<br> |
||
= Optional files = |
= Optional files = |
||
| − | + | *[https://web.archive.org/web/20151029020245/http://cpcbegin.nixiweb.com/tente/index.en.php Labels and some models]. |
|
| − | + | *[https://web.archive.org/web/20151029020208/http://cpcbegin.nixiweb.com/tente/tente3d/iconoldviewtente.zip LDView icons for 3D tente users]. |
|
| + | *[https://github.com/cpcbegin/tentemodels Some example models]. |
||
| Line 40: | Line 29: | ||
*Uncompress the file LDrawTente_Ultima.zip on this folder but MLCad and LeoCAD sub-folders. |
*Uncompress the file LDrawTente_Ultima.zip on this folder but MLCad and LeoCAD sub-folders. |
||
| − | *To star with a good 3D tente's models |
+ | *To star with a good 3D tente's models download [https://github.com/cpcbegin/tentemodels this TENTE ''models'' library]. |
| − | Advice to GNU/Linux users: if your pieces are on /opt/tente for windows software running under wine (i.e.: |
+ | Advice to GNU/Linux users: if your pieces are on /opt/tente for windows software running under wine (i.e.: MLCad) this path might be Z:\opt\tente |
== LDView == |
== LDView == |
||
| Line 51: | Line 40: | ||
*Check “I accept” and press ''Next''. |
*Check “I accept” and press ''Next''. |
||
| − | *Press ''Next'' button. |
+ | *Press ''Next'' button. |
| + | |||
| ⚫ | |||
| + | *Optional: |
||
| − | **Use LDView to open LDraw models: al hacer doble clic en los modelos, abrirá este visor en lugar del editor. |
||
| ⚫ | |||
| ⚫ | |||
| + | **Use LDView to open LDraw models. |
||
| ⚫ | |||
| + | |||
| + | *Press ''Next'' button. |
||
| + | |||
| + | *Press ''Next'' button. |
||
| + | |||
| ⚫ | |||
| + | |||
| + | *LDView runs but you see a warning because it tries to load a lego model but there isn't a lego's set of pieces. |
||
| + | |||
| + | *Select File -> LDraw Dir and choose the tente's set of pieces folder. |
||
| + | |||
| + | *Deactivate the botton like a lego 1x1 piece if you don't whant to see the ''Edge Lines'' of the pieces. |
||
| + | |||
| + | ==MLCad== |
||
| + | |||
| + | ===v3.20=== |
||
| + | |||
| + | This versión can't undo changes but there is some languages libraries. |
||
| + | |||
| + | To install follow this steps: |
||
| + | |||
| + | * Uncompress the file downloader in a folder (for example: C:\tente\mlcad). |
||
| + | |||
| + | * To change the language, uncompress the language file (MLCadLangXXX.dll) in the same folder. |
||
| + | |||
| + | * Replace the mlcad.grp from the pieces ZIP file (subfolder MLCad). |
||
| + | |||
| + | * Run MLCad. Respond Yes to "... Register it now?" question. |
||
| + | |||
| + | * In menu Settings -> General -> Change language combo to your languages. Click OK. Close program and run again. |
||
| + | |||
| + | * In menú Settings -> General -> Change, press Change button and Search. Select pieces folder. a message confirm that's all ok. |
||
| + | ===v3.40=== |
||
| + | |||
| + | This version have less translations but you can undo the changes. |
||
| + | To install follow these steps: |
||
| − | *Pulsar Next. |
||
| + | *Download from official web. |
||
| + | *Uncompress in a folder (i.e.: C:\tente\mlcad). |
||
| + | *Replace oficial mlcad.grp file for the one in tente set of pieces ZIP. |
||
| + | *Run MLCad. |
||
| + | *Press 'Yes' to question "... Register it now?" |
||
| + | If you forgot replace mlcad.grp file before first running MLCad you haven't the right groups for tente because this option is saved on Windows register. After first running you needn't mlcad.grp |
||
| + | We can fix it running these register files: |
||
| − | *Pulsar Next |
||
| + | *[http://dl.dropbox.com/u/1071192/utilidades/mlcad/regs/mlcad-tente.reg?dl=0 mlcad-tente.reg]: groups for tentes, set of pieces must be on C:\TENTE |
||
| + | *[http://dl.dropbox.com/u/1071192/utilidades/mlcad/regs/mlcad-lego-original.reg?dl=0 mlcad-lego-original.reg]: groups for legos (or construblocks), set of pieces must be on C:\LEGO |
||
| + | *[http://dl.dropbox.com/u/1071192/utilidades/mlcad/regs/mlcad-limpia-configuracion.reg?dl=0 mlcad-limpia-configuracion.reg]: Clean mlcad's register like you never run it. |
||
| + | To run this register files type (on Windows console): |
||
| + | <span style="color: rgb(0, 0, 0); font-family: Verdana, Arial, Helvetica, sans-serif; font-size: 12px; font-style: normal; font-variant: normal; font-weight: normal; letter-spacing: normal; line-height: 17px; orphans: 2; text-align: -webkit-auto; text-indent: 0px; text-transform: none; white-space: normal; widows: 2; word-spacing: 0px; -webkit-text-size-adjust: auto; -webkit-text-stroke-width: 0px; display: inline !important; float: none;">regedit /s register_file.reg</span> |
||
| + | If you are using GNU/Linux with wine type this (on GNU/Linux console): |
||
| ⚫ | <span style="color: rgb(0, 0, 0); font-family: Verdana, Arial, Helvetica, sans-serif; font-size: 12px; font-style: normal; font-variant: normal; font-weight: normal; letter-spacing: normal; line-height: 17px; orphans: 2; text-align: -webkit-auto; text-indent: 0px; text-transform: none; white-space: normal; widows: 2; word-spacing: 0px; -webkit-text-size-adjust: auto; -webkit-text-stroke-width: 0px; display: inline !important; float: none;">wine regedit /s </span><span style="color: rgb(0, 0, 0); font-family: Verdana, Arial, Helvetica, sans-serif; font-size: 12px; font-style: normal; font-variant: normal; font-weight: normal; letter-spacing: normal; line-height: 17px; orphans: 2; text-align: -webkit-auto; text-indent: 0px; text-transform: none; white-space: normal; widows: 2; word-spacing: 0px; -webkit-text-size-adjust: auto; -webkit-text-stroke-width: 0px; display: inline !important; float: none;"><span style="color: rgb(0, 0, 0); font-family: Verdana, Arial, Helvetica, sans-serif; font-size: 12px; font-style: normal; font-variant: normal; font-weight: normal; letter-spacing: normal; line-height: 17px; orphans: 2; text-align: -webkit-auto; text-indent: 0px; text-transform: none; white-space: normal; widows: 2; word-spacing: 0px; -webkit-text-size-adjust: auto; -webkit-text-stroke-width: 0px; display: inline !important; float: none;">register_file</span>.reg</span> |
||
| + | More details about Windows register [http://latentetk.superforos.com/viewtopic.php?p=30957#30957 here]. |
||
| + | = Making models = |
||
| ⚫ | |||
| + | You can make models with MLCad. |
||
| − | *El visor se ejecuta y aparecerá un error porque ha cargado un modelo con piezas de Lego. |
||
| + | You can start learning with this tutorial: |
||
| − | *Ir al menú File -> LDraw Dir y seleccionar la carpeta donde están las piezas de Tente. |
||
| ⚫ | |||
| + | The main diference: you'll have the left tree menu with tente series. |
||
| − | *Desactivar el botón con forma de pieza 1x1 si no queréis que pinte los bordes de las piezas (Edge lines). |
||
| + | Hispabrick magazine course will be interesting, especially these numbers: |
||
| − | <h2 data-rte-spaces-after="1" data-rte-spaces-before="1">MLCad 3.20</h2><p data-rte-fromparser="true">This versión can't undo changes but there is some languages libraries.</p><p data-rte-empty-lines-before="1" data-rte-fromparser="true">To install follow this steps:</p><ul data-rte-empty-lines-before="1"><li>Uncompress the file downloader in a folder (for example: C:\tente\mlcad).</li><li>To change the language, uncompress the language file (MLCadLangXXX.dll) in the same folder.</li><li>Replace the mlcad.grp from the pieces ZIP file (subfolder MLCad).</li><li>Run MLCad. Respond Yes to "... Register it now?" question.</li><li>In menu Settings -> General -> Change language combo to your languages. Click OK. Close program and run again.</li><li>In menú Settings -> General -> Change, press Change button and Search. Select pieces folder. a message confirm that's all ok.</li></ul><h4>MLCad 3.40</h4><p data-rte-empty-lines-before="1" data-rte-fromparser="true">Las anteriores instrucciones son para la versión 3.20, que fue la última con traducción al español. La más reciente es la <a class="external text" data-rte-meta="%7B%22type%22%3A%22external%22%2C%22text%22%3A%223.40%22%2C%22link%22%3A%22http%3A%5C%2F%5C%2Fmlcad.lm-software.com%5C%2FMLCad_V3.40.zip%22%2C%22linktype%22%3A%22text%22%2C%22wasblank%22%3Afalse%2C%22wikitext%22%3A%22%5Bhttp%3A%5C%2F%5C%2Fmlcad.lm-software.com%5C%2FMLCad_V3.40.zip%203.40%5D%22%7D" href="http://mlcad.lm-software.com/MLCad_V3.40.zip" rel="nofollow">3.40</a>, que sólo está en inglés, pero permite deshacer los cambios.</p><p data-rte-empty-lines-before="1" data-rte-fromparser="true">Para instalarla seguimos los siguientes pasos:</p><ul data-rte-empty-lines-before="1"><li>Descomprimir el fichero descargado en una carpeta (por ejemplo, C:\tente\mlcad).</li><li>En el fichero ZIP de las piezas había una carpeta MLCad con un fichero mlcad.grp . Éste debe reemplazar al que viene de fábrica.</li><li>Ejecutar MLCad. Pulsar Sí a la pregunta "... Register it now?"</li></ul><p data-rte-empty-lines-before="1" data-rte-fromparser="true">Si por un casual nos hemos olvidado de copiar el archivo mlcad.grp antes de ejecutar MLCad por primera vez no tendremos los grupos correctos para ver las fichas de tente. El asunto es que ahora las opciones las guarda en el Registro de Windows y la primera vez chequea si hay un fichero MLCad.grp y copia esas opciones al registro.</p><p data-rte-empty-lines-before="1" data-rte-fromparser="true">Si no olvidaste copiar mlcad.grp una vez ejecutado por primera vez te da igual mantener o no ese fichero.</p><p data-rte-empty-lines-before="1" data-rte-fromparser="true">También podemos cambiar los grupos de MLCad para tente 3D o lego con los siguientes archivos de registro:</p><ul data-rte-empty-lines-before="1"><li><a class="external text" data-rte-meta="%7B%22type%22%3A%22external%22%2C%22text%22%3A%22mlcad-tente.reg%22%2C%22link%22%3A%22http%3A%5C%2F%5C%2Fdl.dropbox.com%5C%2Fu%5C%2F1071192%5C%2Futilidades%5C%2Fmlcad%5C%2Fregs%5C%2Fmlcad-tente.reg%22%2C%22linktype%22%3A%22text%22%2C%22wasblank%22%3Afalse%2C%22wikitext%22%3A%22%5Bhttp%3A%5C%2F%5C%2Fdl.dropbox.com%5C%2Fu%5C%2F1071192%5C%2Futilidades%5C%2Fmlcad%5C%2Fregs%5C%2Fmlcad-tente.reg%20mlcad-tente.reg%5D%22%7D" href="http://dl.dropbox.com/u/1071192/utilidades/mlcad/regs/mlcad-tente.reg" rel="nofollow">mlcad-tente.reg</a><span data-rte-attribs=" style=color: rgb(0, 0, 0); font-family: Verdana, Arial, Helvetica, sans-serif; font-size: 12px; font-style: normal; font-variant: normal; font-weight: normal; letter-spacing: normal; line-height: 17px; orphans: 2; text-align: -webkit-auto; text-indent: 0px; text-transform: none; white-space: normal; widows: 2; word-spacing: 0px; -webkit-text-size-adjust: auto; -webkit-text-stroke-width: 0px; display: inline !important; float: none; " data-rte-style="color: rgb(0, 0, 0); font-family: Verdana, Arial, Helvetica, sans-serif; font-size: 12px; font-style: normal; font-variant: normal; font-weight: normal; letter-spacing: normal; line-height: 17px; orphans: 2; text-align: -webkit-auto; text-indent: 0px; text-transform: none; white-space: normal; widows: 2; word-spacing: 0px; -webkit-text-size-adjust: auto; -webkit-text-stroke-width: 0px; display: inline !important; float: none;" data-rte-washtml="1" style="color: rgb(0, 0, 0); font-family: Verdana, Arial, Helvetica, sans-serif; font-size: 12px; font-style: normal; font-variant: normal; font-weight: normal; letter-spacing: normal; line-height: 17px; orphans: 2; text-align: -webkit-auto; text-indent: 0px; text-transform: none; white-space: normal; widows: 2; word-spacing: 0px; -webkit-text-size-adjust: auto; -webkit-text-stroke-width: 0px; display: inline !important; float: none;">: para usar MLCAD para hacer tentes, la librería de fichas debe estar en C:\TENTE </span></li></ul><ul data-rte-empty-lines-before="1"><li><a class="external text" data-rte-meta="%7B%22type%22%3A%22external%22%2C%22text%22%3A%22mlcad-lego-original.reg%22%2C%22link%22%3A%22http%3A%5C%2F%5C%2Fdl.dropbox.com%5C%2Fu%5C%2F1071192%5C%2Futilidades%5C%2Fmlcad%5C%2Fregs%5C%2Fmlcad-lego-original.reg%22%2C%22linktype%22%3A%22text%22%2C%22wasblank%22%3Afalse%2C%22wikitext%22%3A%22%5Bhttp%3A%5C%2F%5C%2Fdl.dropbox.com%5C%2Fu%5C%2F1071192%5C%2Futilidades%5C%2Fmlcad%5C%2Fregs%5C%2Fmlcad-lego-original.reg%20mlcad-lego-original.reg%5D%22%7D" href="http://dl.dropbox.com/u/1071192/utilidades/mlcad/regs/mlcad-lego-original.reg" rel="nofollow">mlcad-lego-original.reg</a><span data-rte-attribs=" style=color: rgb(0, 0, 0); font-family: Verdana, Arial, Helvetica, sans-serif; font-size: 12px; font-style: normal; font-variant: normal; font-weight: normal; letter-spacing: normal; line-height: 17px; orphans: 2; text-align: -webkit-auto; text-indent: 0px; text-transform: none; white-space: normal; widows: 2; word-spacing: 0px; -webkit-text-size-adjust: auto; -webkit-text-stroke-width: 0px; display: inline !important; float: none; " data-rte-style="color: rgb(0, 0, 0); font-family: Verdana, Arial, Helvetica, sans-serif; font-size: 12px; font-style: normal; font-variant: normal; font-weight: normal; letter-spacing: normal; line-height: 17px; orphans: 2; text-align: -webkit-auto; text-indent: 0px; text-transform: none; white-space: normal; widows: 2; word-spacing: 0px; -webkit-text-size-adjust: auto; -webkit-text-stroke-width: 0px; display: inline !important; float: none;" data-rte-washtml="1" style="color: rgb(0, 0, 0); font-family: Verdana, Arial, Helvetica, sans-serif; font-size: 12px; font-style: normal; font-variant: normal; font-weight: normal; letter-spacing: normal; line-height: 17px; orphans: 2; text-align: -webkit-auto; text-indent: 0px; text-transform: none; white-space: normal; widows: 2; word-spacing: 0px; -webkit-text-size-adjust: auto; -webkit-text-stroke-width: 0px; display: inline !important; float: none;">: para usar MLCAD para hacer legos (o construblocks), la librería de fichas debe estar en C:\LEGO </span></li></ul><p data-rte-fromparser="true"><a class="external text" data-rte-meta="%7B%22type%22%3A%22external%22%2C%22text%22%3A%22mlcad-limpia-configuracion.reg%22%2C%22link%22%3A%22http%3A%5C%2F%5C%2Fdl.dropbox.com%5C%2Fu%5C%2F1071192%5C%2Futilidades%5C%2Fmlcad%5C%2Fregs%5C%2Fmlcad-limpia-configuracion.reg%22%2C%22linktype%22%3A%22text%22%2C%22wasblank%22%3Afalse%2C%22wikitext%22%3A%22%5Bhttp%3A%5C%2F%5C%2Fdl.dropbox.com%5C%2Fu%5C%2F1071192%5C%2Futilidades%5C%2Fmlcad%5C%2Fregs%5C%2Fmlcad-limpia-configuracion.reg%20mlcad-limpia-configuracion.reg%5D%22%7D" href="http://dl.dropbox.com/u/1071192/utilidades/mlcad/regs/mlcad-limpia-configuracion.reg" rel="nofollow">mlcad-limpia-configuracion.reg</a><span data-rte-attribs=" style=color: rgb(0, 0, 0); font-family: Verdana, Arial, Helvetica, sans-serif; font-size: 12px; font-style: normal; font-variant: normal; font-weight: normal; letter-spacing: normal; line-height: 17px; orphans: 2; text-align: -webkit-auto; text-indent: 0px; text-transform: none; white-space: normal; widows: 2; word-spacing: 0px; -webkit-text-size-adjust: auto; -webkit-text-stroke-width: 0px; display: inline !important; float: none; " data-rte-style="color: rgb(0, 0, 0); font-family: Verdana, Arial, Helvetica, sans-serif; font-size: 12px; font-style: normal; font-variant: normal; font-weight: normal; letter-spacing: normal; line-height: 17px; orphans: 2; text-align: -webkit-auto; text-indent: 0px; text-transform: none; white-space: normal; widows: 2; word-spacing: 0px; -webkit-text-size-adjust: auto; -webkit-text-stroke-width: 0px; display: inline !important; float: none;" data-rte-washtml="1" style="color: rgb(0, 0, 0); font-family: Verdana, Arial, Helvetica, sans-serif; font-size: 12px; font-style: normal; font-variant: normal; font-weight: normal; letter-spacing: normal; line-height: 17px; orphans: 2; text-align: -webkit-auto; text-indent: 0px; text-transform: none; white-space: normal; widows: 2; word-spacing: 0px; -webkit-text-size-adjust: auto; -webkit-text-stroke-width: 0px; display: inline !important; float: none;">: Limpiador de configuración, deja MLCAD como si lo estuvieramos ejecutando por primera vez. <!-- RTE::{"spaces":3,"type":"LINE_BREAK"} --></span></p><p data-rte-empty-lines-before="1" data-rte-fromparser="true"><span data-rte-attribs=" style=color: rgb(0, 0, 0); font-family: Verdana, Arial, Helvetica, sans-serif; font-size: 12px; font-style: normal; font-variant: normal; font-weight: normal; letter-spacing: normal; line-height: 17px; orphans: 2; text-align: -webkit-auto; text-indent: 0px; text-transform: none; white-space: normal; widows: 2; word-spacing: 0px; -webkit-text-size-adjust: auto; -webkit-text-stroke-width: 0px; display: inline !important; float: none; " data-rte-line-start="true" data-rte-style="color: rgb(0, 0, 0); font-family: Verdana, Arial, Helvetica, sans-serif; font-size: 12px; font-style: normal; font-variant: normal; font-weight: normal; letter-spacing: normal; line-height: 17px; orphans: 2; text-align: -webkit-auto; text-indent: 0px; text-transform: none; white-space: normal; widows: 2; word-spacing: 0px; -webkit-text-size-adjust: auto; -webkit-text-stroke-width: 0px; display: inline !important; float: none;" data-rte-washtml="1" style="color: rgb(0, 0, 0); font-family: Verdana, Arial, Helvetica, sans-serif; font-size: 12px; font-style: normal; font-variant: normal; font-weight: normal; letter-spacing: normal; line-height: 17px; orphans: 2; text-align: -webkit-auto; text-indent: 0px; text-transform: none; white-space: normal; widows: 2; word-spacing: 0px; -webkit-text-size-adjust: auto; -webkit-text-stroke-width: 0px; display: inline !important; float: none;">La manera de aplicarlo es desde la consola de Windows con el comando:</span></p><pre><span data-rte-attribs=" style=color: rgb(0, 0, 0); font-family: Verdana, Arial, Helvetica, sans-serif; font-size: 12px; font-style: normal; font-variant: normal; font-weight: normal; letter-spacing: normal; line-height: 17px; orphans: 2; text-align: -webkit-auto; text-indent: 0px; text-transform: none; white-space: normal; widows: 2; word-spacing: 0px; -webkit-text-size-adjust: auto; -webkit-text-stroke-width: 0px; display: inline !important; float: none; " data-rte-style="color: rgb(0, 0, 0); font-family: Verdana, Arial, Helvetica, sans-serif; font-size: 12px; font-style: normal; font-variant: normal; font-weight: normal; letter-spacing: normal; line-height: 17px; orphans: 2; text-align: -webkit-auto; text-indent: 0px; text-transform: none; white-space: normal; widows: 2; word-spacing: 0px; -webkit-text-size-adjust: auto; -webkit-text-stroke-width: 0px; display: inline !important; float: none;" data-rte-washtml="1" style="color: rgb(0, 0, 0); font-family: Verdana, Arial, Helvetica, sans-serif; font-size: 12px; font-style: normal; font-variant: normal; font-weight: normal; letter-spacing: normal; line-height: 17px; orphans: 2; text-align: -webkit-auto; text-indent: 0px; text-transform: none; white-space: normal; widows: 2; word-spacing: 0px; -webkit-text-size-adjust: auto; -webkit-text-stroke-width: 0px; display: inline !important; float: none;">regedit /s register_file.reg</span> |
||
| ⚫ | |||
| − | </pre><p data-rte-fromparser="true">Más detalles sobre el registro <a class="external text" data-rte-meta="%7B%22type%22%3A%22external%22%2C%22text%22%3A%22aqu%5Cu00ed%22%2C%22link%22%3A%22http%3A%5C%2F%5C%2Flatentetk.superforos.com%5C%2Fviewtopic.php%3Fp%3D30957%2330957%22%2C%22linktype%22%3A%22text%22%2C%22wasblank%22%3Afalse%2C%22wikitext%22%3A%22%5Bhttp%3A%5C%2F%5C%2Flatentetk.superforos.com%5C%2Fviewtopic.php%3Fp%3D30957%2330957%20aqu%5Cu00ed%5D%22%7D" href="http://latentetk.superforos.com/viewtopic.php?p=30957#30957" rel="nofollow">aquí</a>.</p> |
||
| + | *no.1: pages 25 to 28 (essencial). |
||
| − | = Creación de modelos = |
||
| + | *no.3: pages 24 to 27 (favorites and pieces tree). |
||
| − | La creación de modelos se realiza con MLCad. Podéis empezar con este breve tutorial: |
||
| ⚫ | |||
| − | La principal diferencia con el tutorial es que el árbol de menú de la izquierda está personalizado con las series de Tente. |
||
| − | También puede ser de ayuda el curso publicado en la revista gratuita Hispabrick Magazine. Lo más interesante está en los números: |
||
| − | - 1: páginas 25 a 28 (lo esencial). |
||
| − | - 3: páginas 24 a 27 (favoritos y el árbol de piezas). |
||
| − | MLCad |
+ | MLCad has a simple 3D view, so you need LDView to get a good render of your model. To learn more about LDView: |
http://lrobotikas.net/mediawiki/index.php?title=Renderizado_r%C3%A1pido_con_LDView |
http://lrobotikas.net/mediawiki/index.php?title=Renderizado_r%C3%A1pido_con_LDView |
||
| + | OK! You can make your own tente models with easy software and you have no limits of pieces. |
||
| − | ¡Ánimo! Ahora ya podéis construir vuestros modelos sin limitaciones de piezas y con programas sencillos. Además, para compartir vuestros modelos sólo tendréis que colgar el fichero (*.dat o *.ldr) y cualquiera que se haya instalado las piezas y el visor podrá verlos (el editor sólo hace falta para crear y modificar). |
||
| + | You can share your models uploading a small file *.dat or *.ldr. Other people only need LDView and set of pieces to see it. |
||
| − | Si no tenéis sitio web para subirlo podéis usar los servicios de sitios de descarga directa como Rapidshare o bien Dropbox. |
||
| + | You can upload it on your own website or direct downloading sites or services like dropbox. |
||
| − | Esta última opción es la más recomendable pues permite tener una carpeta del disco duro sincronizada con este sitio web y decidir que subdirectorio lo ponemos como público para compartir con los demás poniendo un simple enlace a él. |
||
| + | I think dropbox is the best option because you share a folder of your hard disc and you define a subfolder as public like a simple link. |
||
Revision as of 18:28, 22 June 2020
Introduction
LDraw™ is an open standard for LEGO CAD programs that allow the user to create virtual LEGO models and scenes, but we can also make TENTE ones.
You need a set of virtual pieces, an editor to make the models and a viewer to render and see like real ones. We are going to use MLCad as editor and LDView as 3D viewer. Both programs are free and lego users use them for years.
The files you need
- LDView, the GNU 3D viewer.
- MLCad, the free editor for Windows (GNU/Linux compatible with wine).
Optional files
Installing LDraw
Tente's set of pieces
- Make a folder where you want (for example C:\Tente on Windows or /opt/tente on GNU/Linux)
- Uncompress the file LDrawTente_Ultima.zip on this folder but MLCad and LeoCAD sub-folders.
- To star with a good 3D tente's models download this TENTE models library.
Advice to GNU/Linux users: if your pieces are on /opt/tente for windows software running under wine (i.e.: MLCad) this path might be Z:\opt\tente
LDView
- Run LDView-4100.exe.
- Press Next button.
- Check “I accept” and press Next.
- Press Next button.
- Optional:
- Create a desktop icon.
- Use LDView to open LDraw models.
- Use LDView to generate thumbnails in Windows Explorer.
- Press Next button.
- Press Next button.
- Unselect Readme.txt.
- LDView runs but you see a warning because it tries to load a lego model but there isn't a lego's set of pieces.
- Select File -> LDraw Dir and choose the tente's set of pieces folder.
- Deactivate the botton like a lego 1x1 piece if you don't whant to see the Edge Lines of the pieces.
MLCad
v3.20
This versión can't undo changes but there is some languages libraries.
To install follow this steps:
- Uncompress the file downloader in a folder (for example: C:\tente\mlcad).
- To change the language, uncompress the language file (MLCadLangXXX.dll) in the same folder.
- Replace the mlcad.grp from the pieces ZIP file (subfolder MLCad).
- Run MLCad. Respond Yes to "... Register it now?" question.
- In menu Settings -> General -> Change language combo to your languages. Click OK. Close program and run again.
- In menú Settings -> General -> Change, press Change button and Search. Select pieces folder. a message confirm that's all ok.
v3.40
This version have less translations but you can undo the changes.
To install follow these steps:
- Download from official web.
- Uncompress in a folder (i.e.: C:\tente\mlcad).
- Replace oficial mlcad.grp file for the one in tente set of pieces ZIP.
- Run MLCad.
- Press 'Yes' to question "... Register it now?"
If you forgot replace mlcad.grp file before first running MLCad you haven't the right groups for tente because this option is saved on Windows register. After first running you needn't mlcad.grp
We can fix it running these register files:
- mlcad-tente.reg: groups for tentes, set of pieces must be on C:\TENTE
- mlcad-lego-original.reg: groups for legos (or construblocks), set of pieces must be on C:\LEGO
- mlcad-limpia-configuracion.reg: Clean mlcad's register like you never run it.
To run this register files type (on Windows console):
regedit /s register_file.reg
If you are using GNU/Linux with wine type this (on GNU/Linux console):
wine regedit /s register_file.reg
More details about Windows register here.
Making models
You can make models with MLCad.
You can start learning with this tutorial: http://en.wikipedia.org/wiki/Mlcad The main diference: you'll have the left tree menu with tente series.
Hispabrick magazine course will be interesting, especially these numbers:
- no.1: pages 25 to 28 (essencial).
- no.3: pages 24 to 27 (favorites and pieces tree).
MLCad has a simple 3D view, so you need LDView to get a good render of your model. To learn more about LDView: http://lrobotikas.net/mediawiki/index.php?title=Renderizado_r%C3%A1pido_con_LDView
OK! You can make your own tente models with easy software and you have no limits of pieces. You can share your models uploading a small file *.dat or *.ldr. Other people only need LDView and set of pieces to see it. You can upload it on your own website or direct downloading sites or services like dropbox. I think dropbox is the best option because you share a folder of your hard disc and you define a subfolder as public like a simple link.